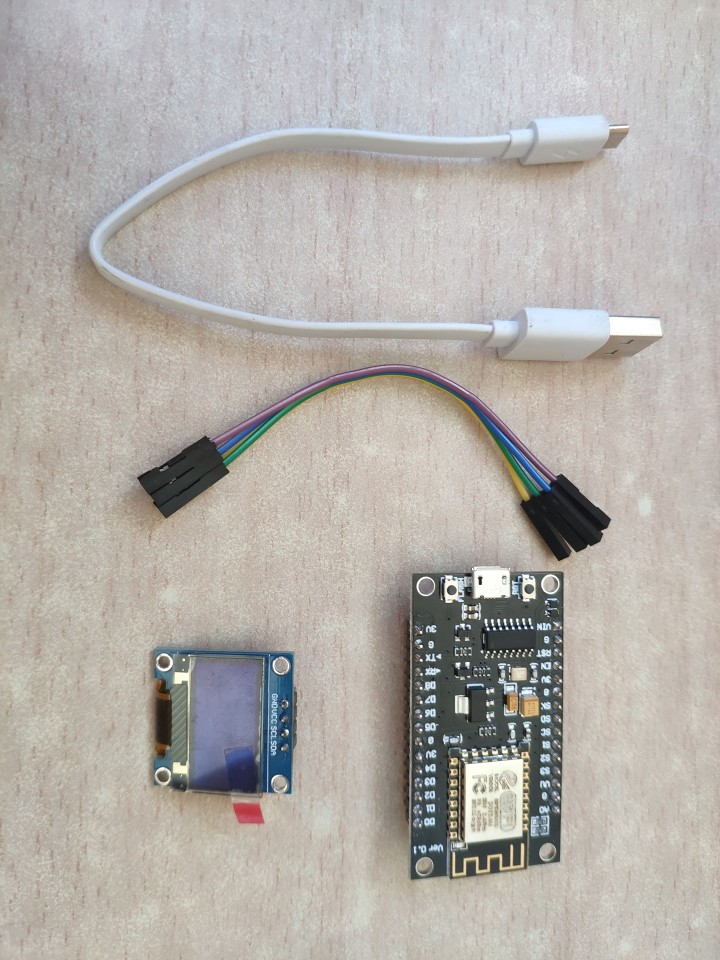
材料:
1、ESP8266开发板×1
2、0.96寸OLED屏幕i2c接口×1
3、母对母杜邦线×4
4、USB数据线×1
5、openweathermap天气Key码一个
制作时使用到的固件及工具
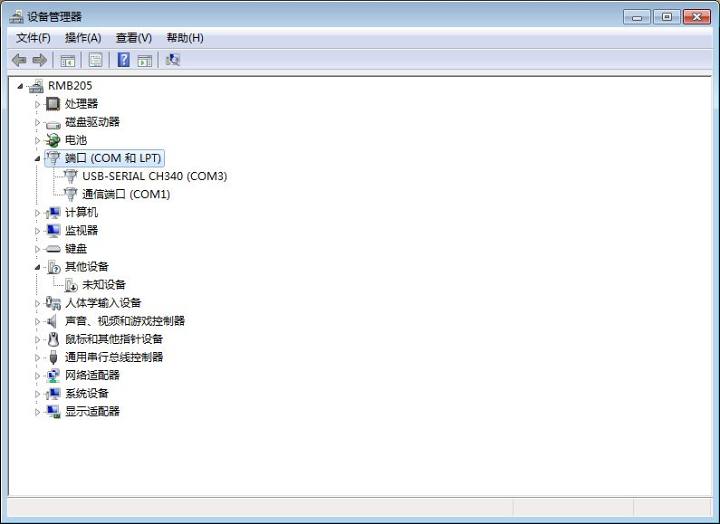
(1) 安装驱动和Ardunio,将ESP8266用数据线连接至电脑,之后打开设备管理器,查看端口情况,能看到COM3,表示连接成功
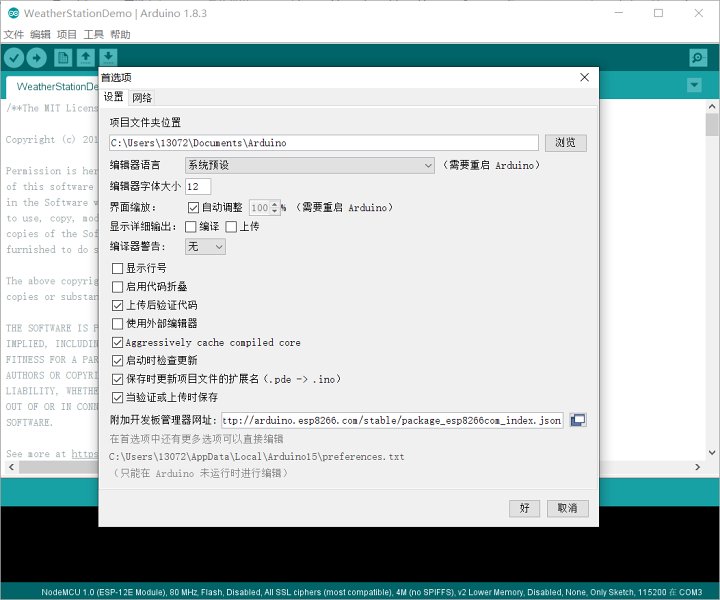
(2) 接着配置及安装ESP8266固件,打开第一个

文件👉首选项,找到附加开发板管理器网址选项,填入查看链接
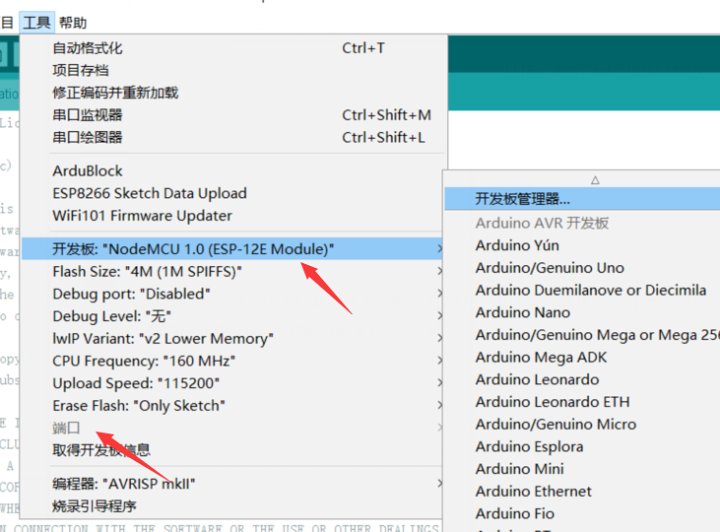
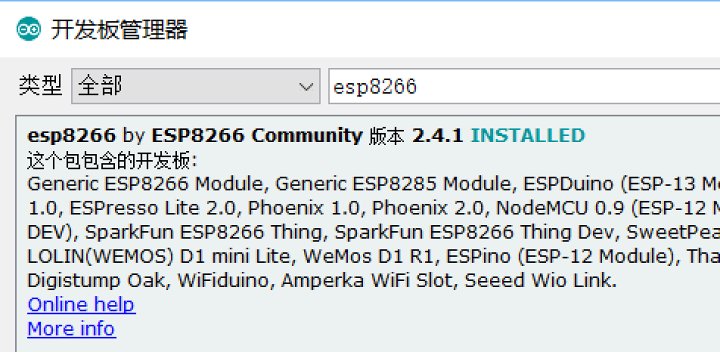
工具👉开发板👉开发板管理器,搜索ESP8266模块,安装最新版。
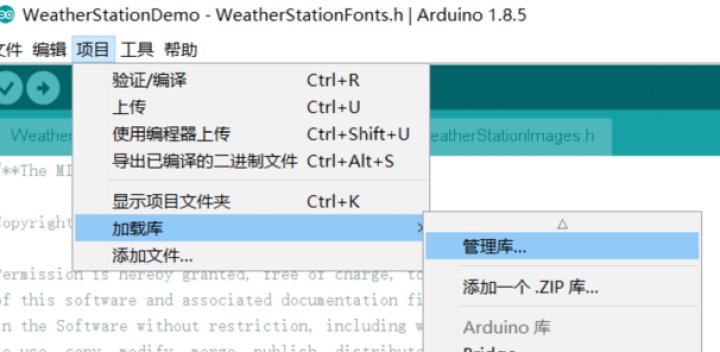
成功安装完固件之后,找到并安装这3个库:
1.ESP8266 Weather Station
2.JSON Streaming Parser by Daniel Eichhorn
3.ESP8266 OLED Driver for SSD1306 display by Daniel Eichhorn. 3.0.0 版本以上
(3) 安装完之后修改以下代码

填写你家WIFI名称及密码
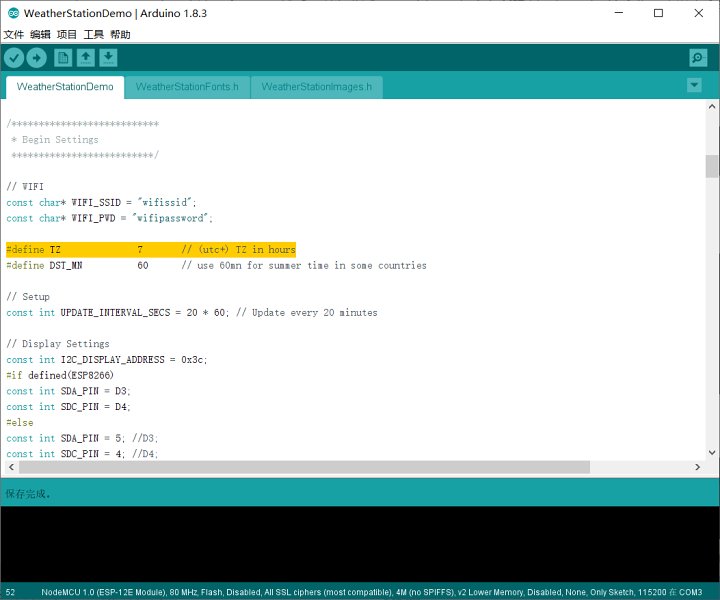
设置为北京时间
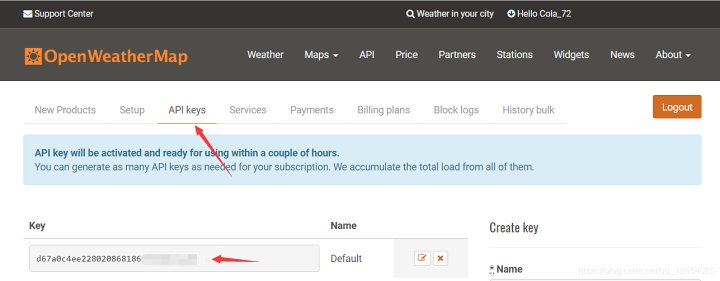
打开查看链接
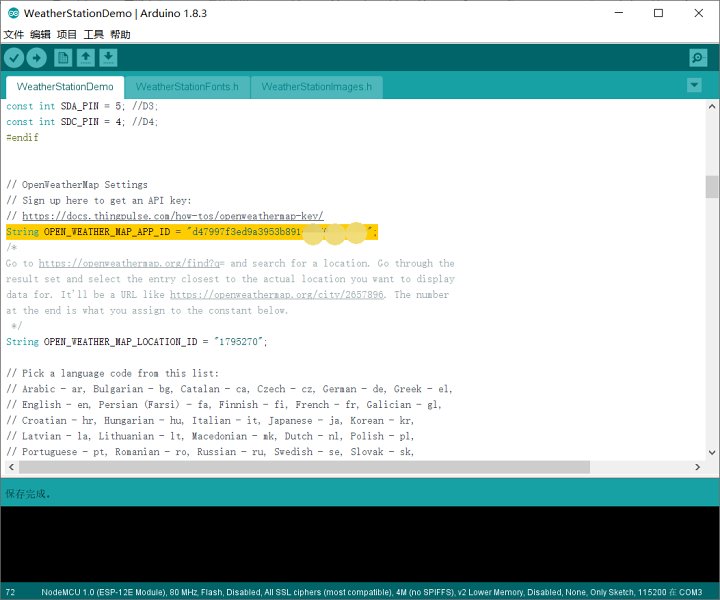
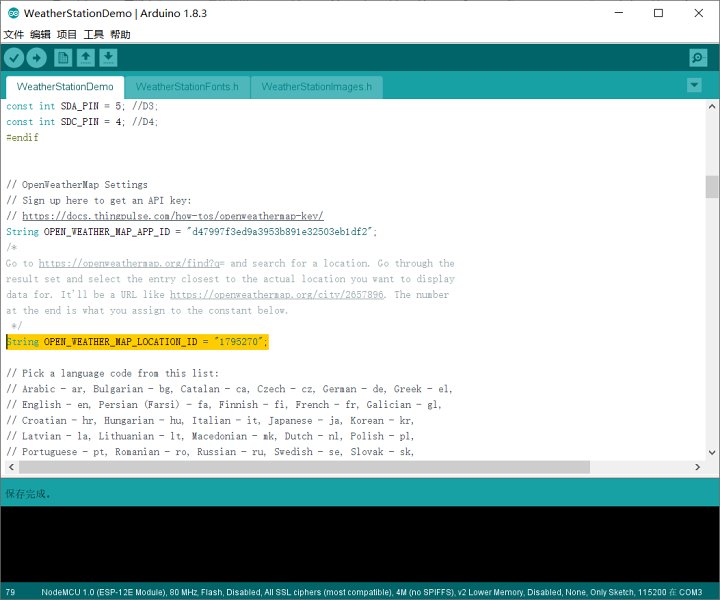
注册登陆后获取Key
再通过压缩包中的文件获取城市编号ID

获取到Key和城市ID之后进行修改
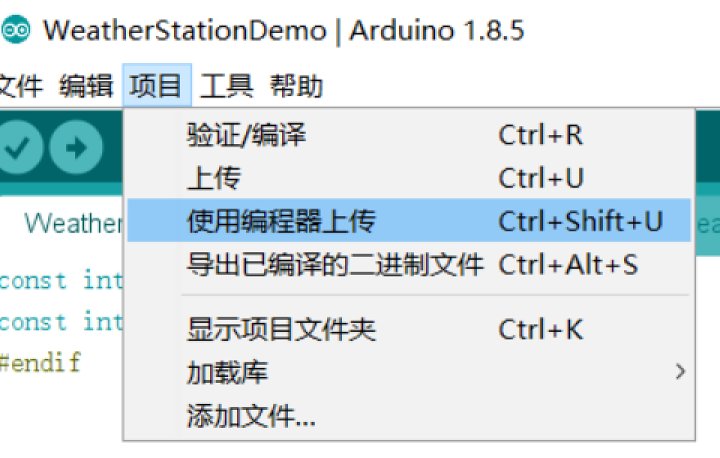
之后上传项目,稍等片刻
完了之后按下RST键
(4) 接线
将屏幕和esp8266按照这个连起来。
G👉gnd
3v👉vcc
d4👉scl
d3👉sda
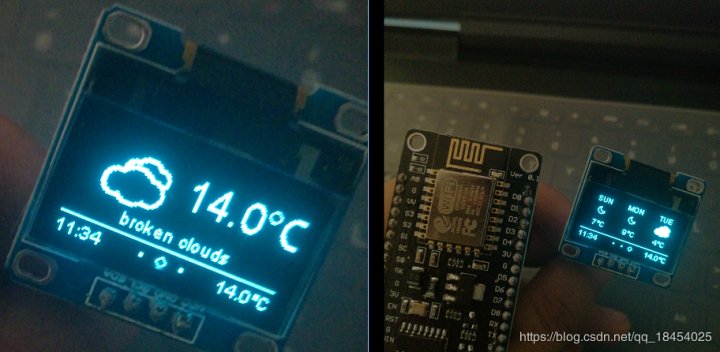
完成以后再次按下板子上的RST键,就可以看到已经连接上wifi并且显示天气和时间了
本文来自酷基:首席养猪人

diy使我快乐
@小棉最可爱了 还有这种骚操作,不亏是棉棉